Jul 29, 2023
Keeping Systems Safe With Vulnerability Scanning
Vulnerability scanning plays a pivotal role in maintaining the integrity and security of digital systems. By identifying weak points, prioritizing risks, ensuring compliance with industry standards, and facilitating a proactive approach, it acts as a preventive measure against cyber threats. Regular scans also support organizations during cyber attacks, helping to quickly understand and respond to breaches. Additionally, it provides invaluable insights when integrating new software or hardware, ensuring they don't introduce additional risks. In essence, vulnerability scanning is a foundational tool in cybersecurity, offering organizations a thorough assessment of their digital defenses and areas for improvement.
What is Nessus?
Nessus is a software tool designed to scan computer systems and networks for vulnerabilities. Developed by Tenable Network Security, it checks for security gaps that could be exploited by malicious actors. It does this by comparing system configurations, software, and other elements against a database of known vulnerabilities.
Why is Nessus Important for Vulnerability Management in Cybersecurity?
Comprehensive Detection: With a vast database that's regularly updated, Nessus can identify a wide range of vulnerabilities, ensuring that systems are checked against the most recent security threats.
Customizable Scans: Organizations have varying needs based on their infrastructure, software, and regulatory requirements. Nessus allows for tailored scans, enabling businesses to focus on specific areas of interest or concern.
Severity-Based Insights: Nessus not only identifies vulnerabilities but also ranks them based on potential impact. This allows IT teams to prioritize and address the most critical vulnerabilities first.
Assists in Compliance: Many industries have stringent regulatory requirements related to cybersecurity. Nessus can check systems against these standards, ensuring that an organization remains compliant.
Regular Updates: The cybersecurity landscape is continuously evolving, with new vulnerabilities emerging regularly. Nessus stays updated with these changes, ensuring that scans reflect the latest known threats.
Integration Capabilities: Nessus can be integrated with other cybersecurity tools, offering a more cohesive and comprehensive approach to vulnerability management.
Proactive Defense: By identifying vulnerabilities before they are exploited, Nessus helps organizations to proactively defend themselves, reducing the risk of security breaches.
Its ability to systematically identify, rank, and assist in patching vulnerabilities makes it an invaluable asset for any organization serious about protecting its digital infrastructure.
What we'll learn
In this project, we're focusing on identifying and fixing security gaps using Nessus Essentials. We'll run this tool on virtual computers, spotting any vulnerabilities. After addressing these issues, we'll do another scan to ensure the fixes worked properly. This process is crucial for maintaining secure systems. We'll be following Josh Madakor's walkthrough for this project.
Content
Set up VMWare Player
Setup Windows 10 ISO
Download and Set up Nessus Essentials
Verify connectivity with VM
Initiate a new vulnerability scan using Nessus
Review initial scan results (without using credentials)
Prepare Virtual Machine for scans that require credentials
Execute the first credentialed scan
Examine the results from the credentialed scan
Install deprecated Firefox on the VM
Evaluate scan findings post Firefox installation
Address and fix detected vulnerabilities
Check scan outcomes after vulnerability mitigation
Additional reflections on managing vulnerabilities in a business setting
Closing Thoughts
Set up VMware Player
Navigate to the VMware Download Center.
Locate VMware Workstation Player under Desktop & End user Computing.
Select the installer from the list according to your host operating system.
Click Download.
Run Installer: Open the downloaded file.
Follow Steps: Go through the setup wizard, clicking "Next" after each step.
Agree to License: Accept the terms of the License Agreement.
Setup Type: Select "Typical" setup.
Choose Preferences: Decide on updates and improvement program participation.
Shortcut: Choose whether to create a desktop shortcut.
Install: Click "Install" and wait for it to finish.
Finish and Restart: Click "Finish" and restart your computer if necessary.
Open VMware: Launch VMware from desktop or Start Menu.
Setup Windows 10 ISO
Open the installer
Agree to license
Create installation media: ISO
Use recommended settings
Choose ISO file
Choose the path for your ISO file
Launch VMware
Select Create a New Virtual Machine
Find the path to your Windows 10 ISO
Name your virtual machine
Disk Space Capacity default settings
Click Customize Hardware
Change Network Adapter to Bridged

Change RAM to 4gb and Processor to 4 if possible
Click Finish
Launch your VM
Press a button to continue with setup
Choose I don't have a product key
Choose Windows 10 Pro
Click Custom install > Next
Setup for personal use
Choose offline account
Limit experience
Name your PC and create a password
Choose no on privacy settings
Skip Cortana
Download and Set up Nessus Essentials
Register for an activation code
Check your email for an activation code
In your email click on Download
Click on Download Tenable Nessus: Nessus and Nessus Manager
Download and install Nessus
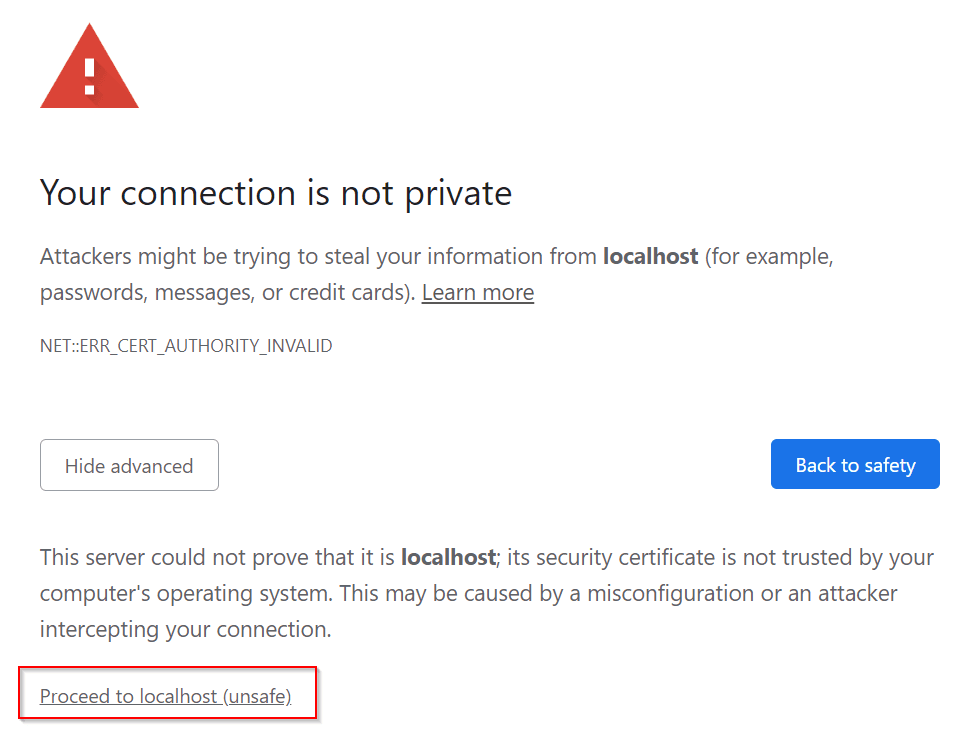
Save the URL: http://localhost:8834/WelcomeToNessus-Install/welcome
Click Connect via SSL
Click Advanced > Proceed to localhost (unsafe)
Continue to installation
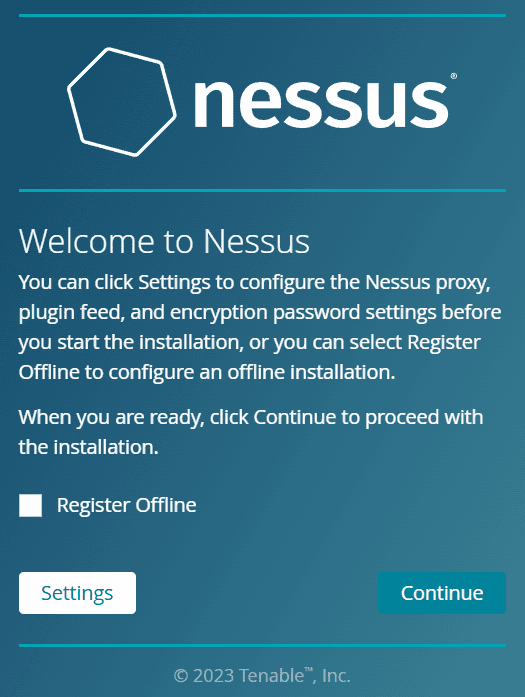
Register for Nessus Essentials
Skip and enter your Activation code from you email and Register for Nessus
Create your username and password
Log into Nessus Essentials
Verify connectivity with VM
Navigate to command prompt within your VM
Type ipconfig
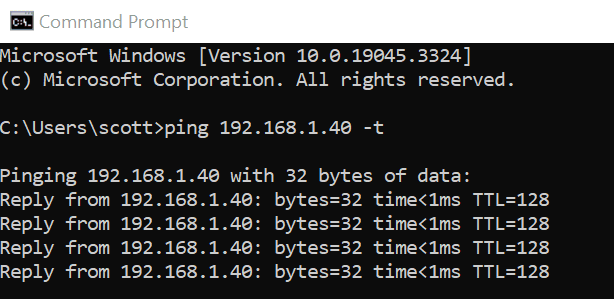
Ping your IPv4 Address from your local machine. There will be a request time out
In your VM navigate to wf.msc
Navigate to Windows Defender Firewall Properties
Turn off firewall state for domain profile, private profile, public profile
Ping your IPv4 VM Address again from your local machine
Initiate a new vulnerability scan using Nessus
Navigate to Create a New Scan > Basic Network Scan
Enter the name and Target (your VM IPv4 Address). Click Save
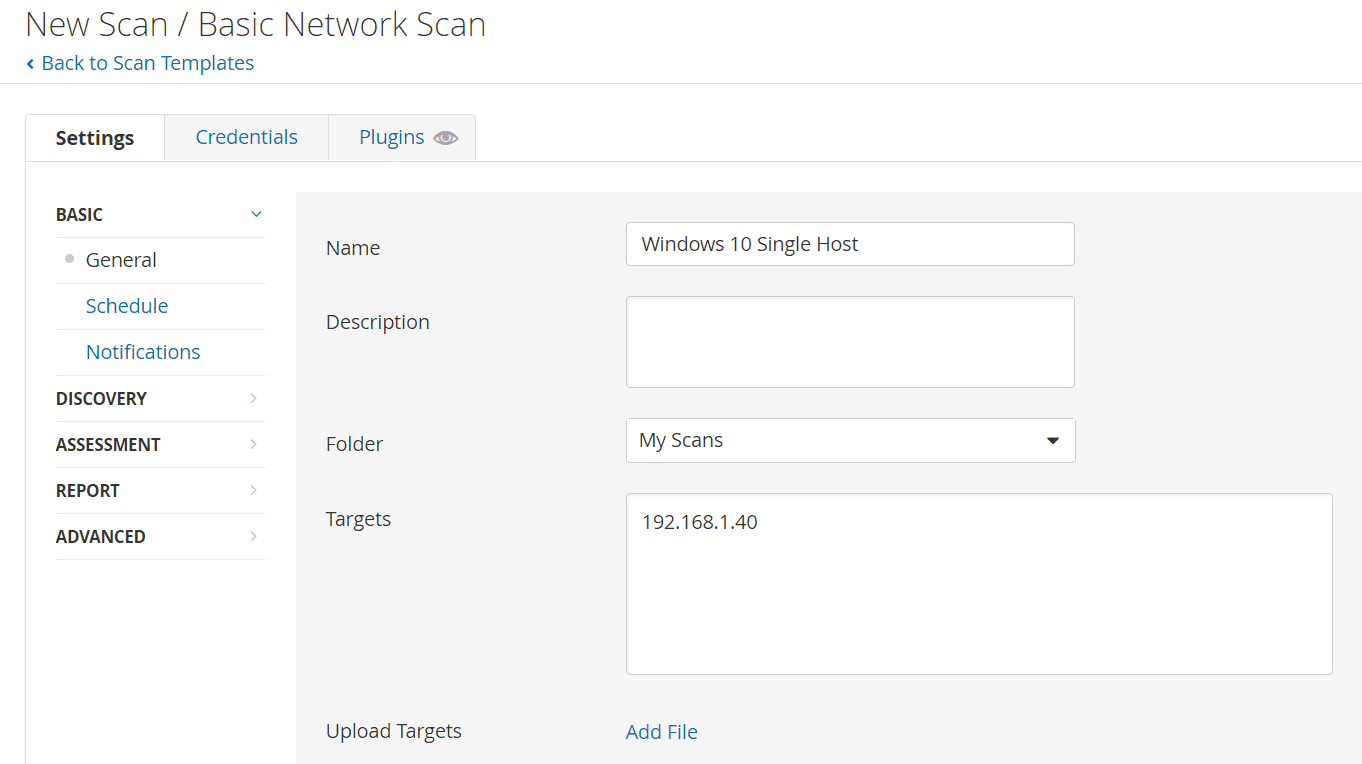
Click Launch after it is created
Wait for the Scan to complete
Review initial scan results (without using credentials)
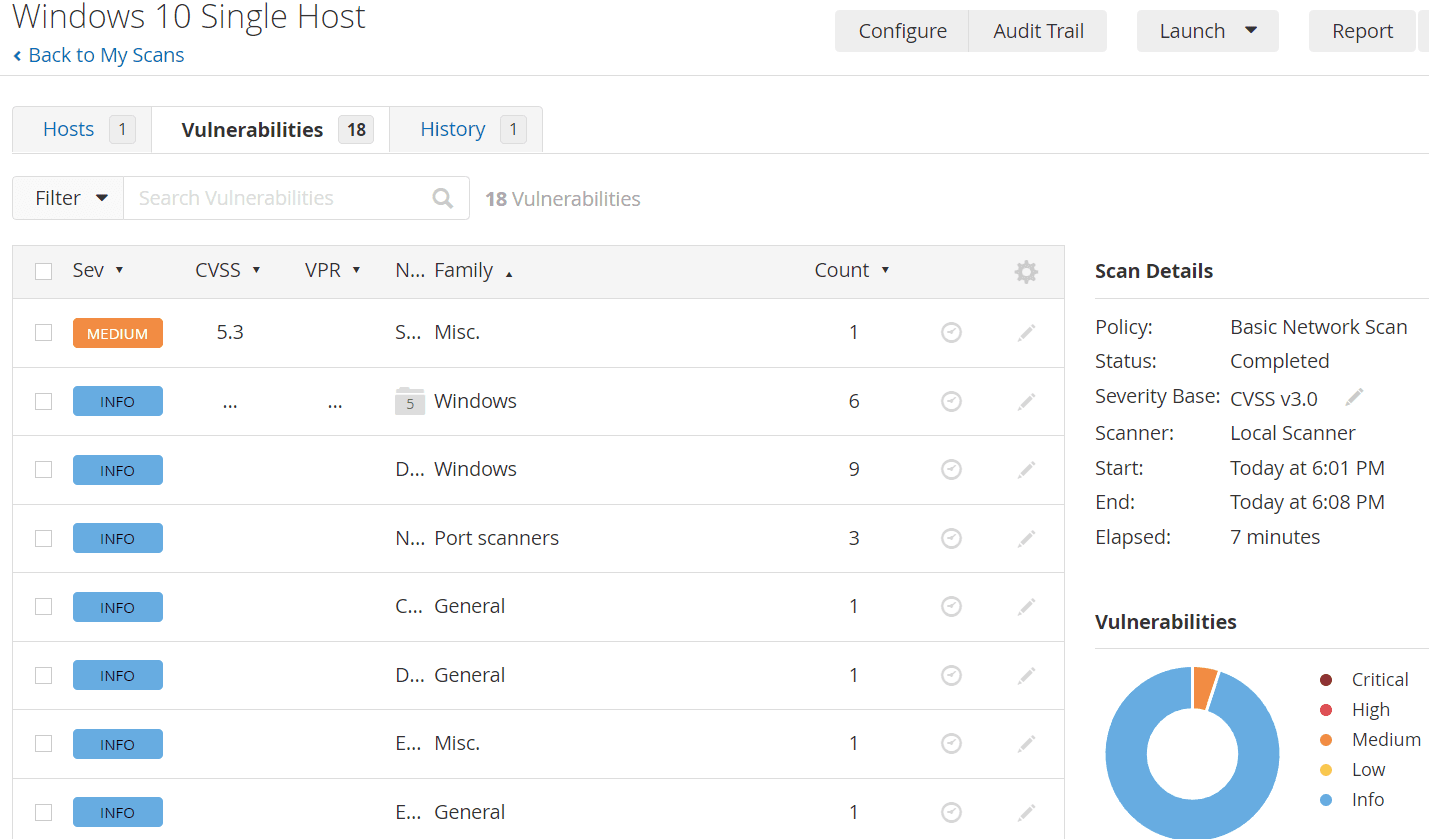
Prepare Virtual Machine for scans that require credentials
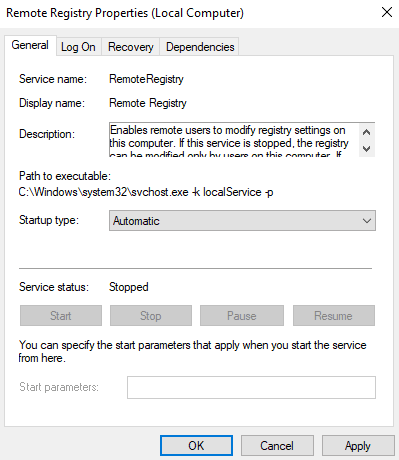
Navigate to services.msc inside your VM > Remote Registry
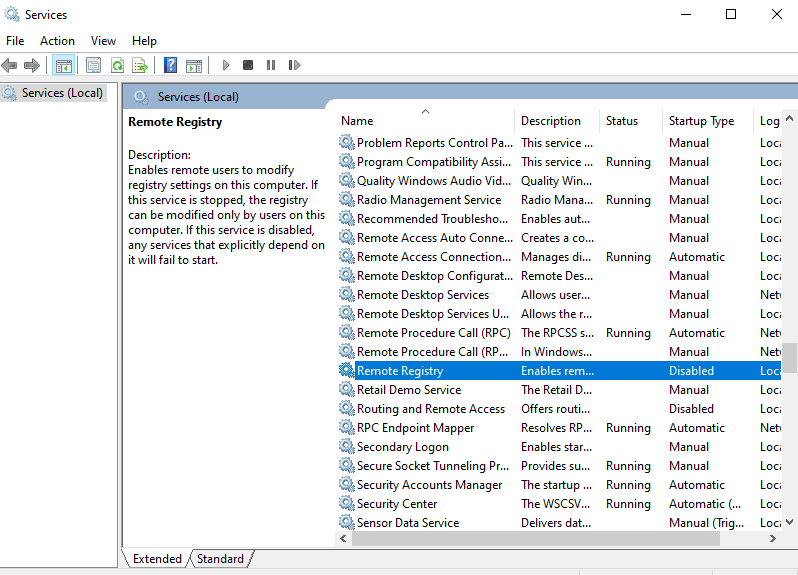
Select Automatic in Startup Type and click Start
Navigate to Advanced Sharing Settings > turn on file and printer sharing
Navigate to User Account Control Settings > lower to Never Notfiy
Navigate to Regedit > HKEY_LOCAL_MACHINE > SOFTWARE > Microsoft > Windows > CurrentVersion > Policies > System
Create new DWORD by right clicking new DWORD called LocalAccountTokenFilterPolicy
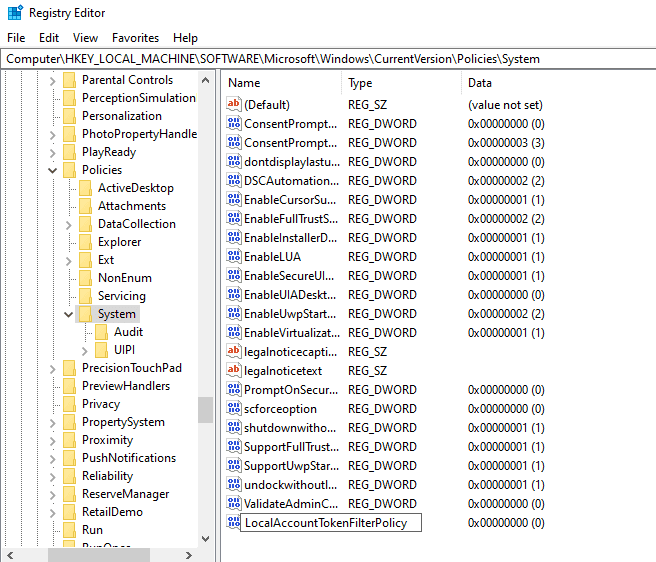
Right Click the DWORD > Modify > Value Data: 1
Restart your VM
Execute the first credentialed scan
Navigate to Nessus Essentials
Navigate to My Scans > Check the box for Windows 10 Single Host > More > Configure > Credentials > Windows
Enter Username and Password that you created for this VM. Click Save
Navigate back to My Scans and launch your scan
Examine the results from the credentialed scan
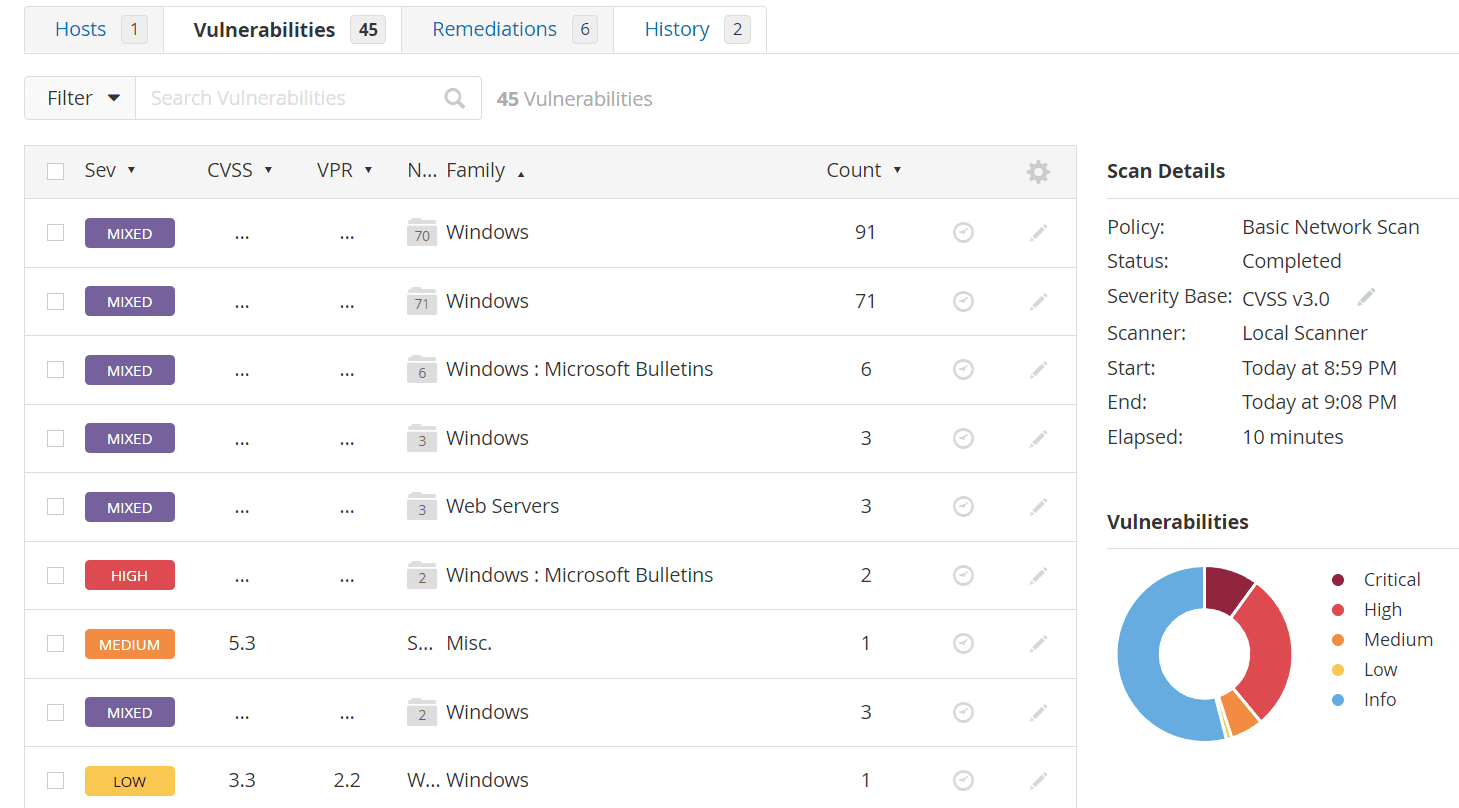
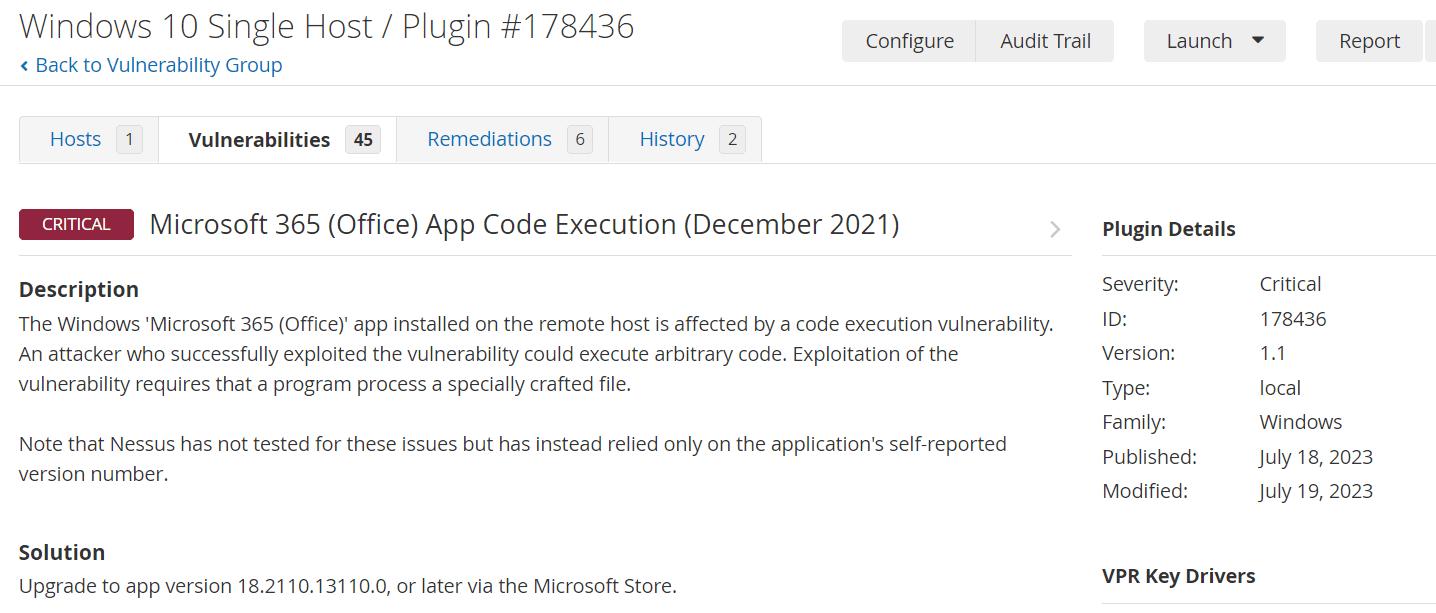
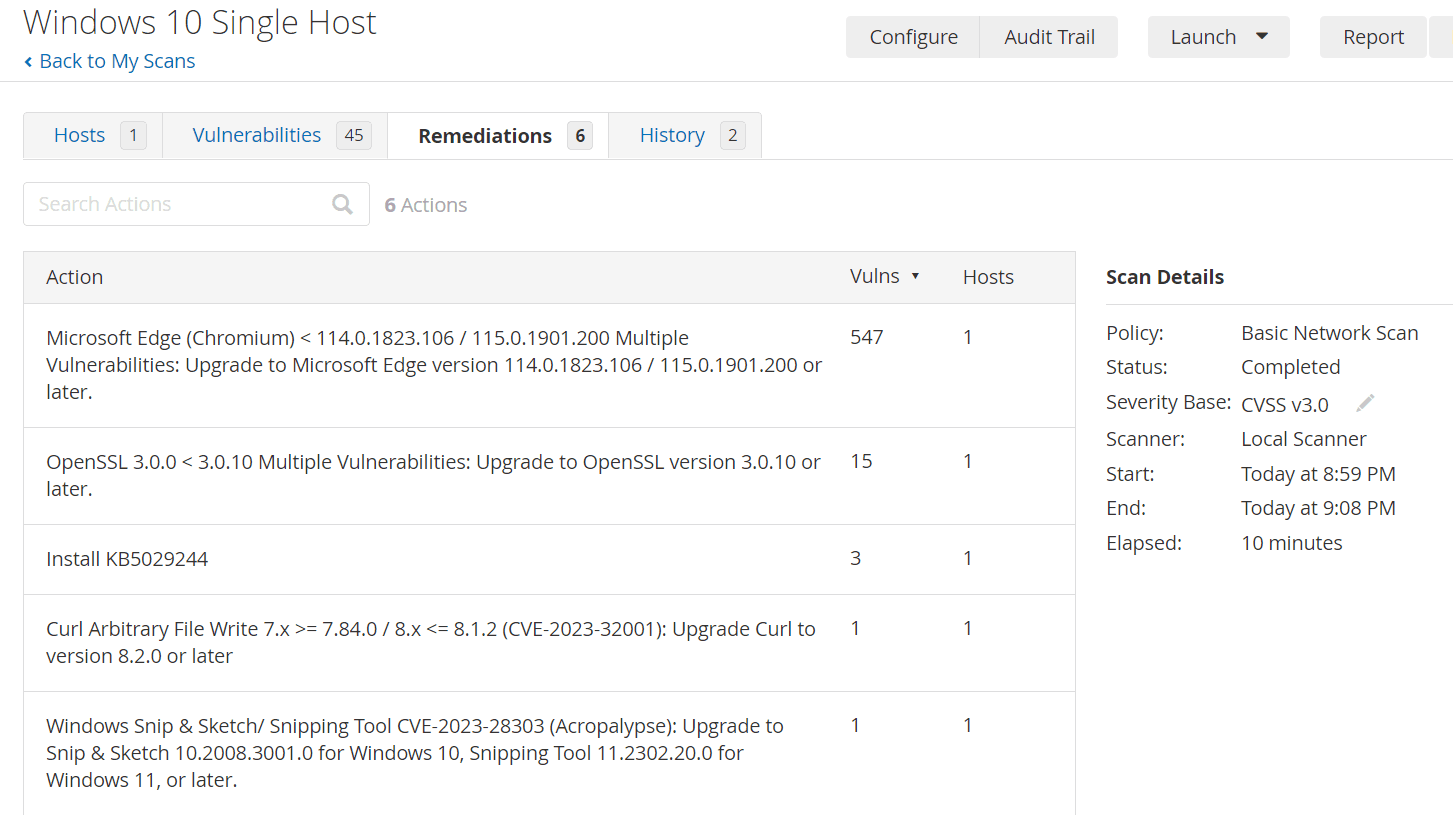
Install deprecated Firefox on the VM
Install on your VM
Run another scan in Nessus Essentials
Evaluate scan findings post Firefox installation
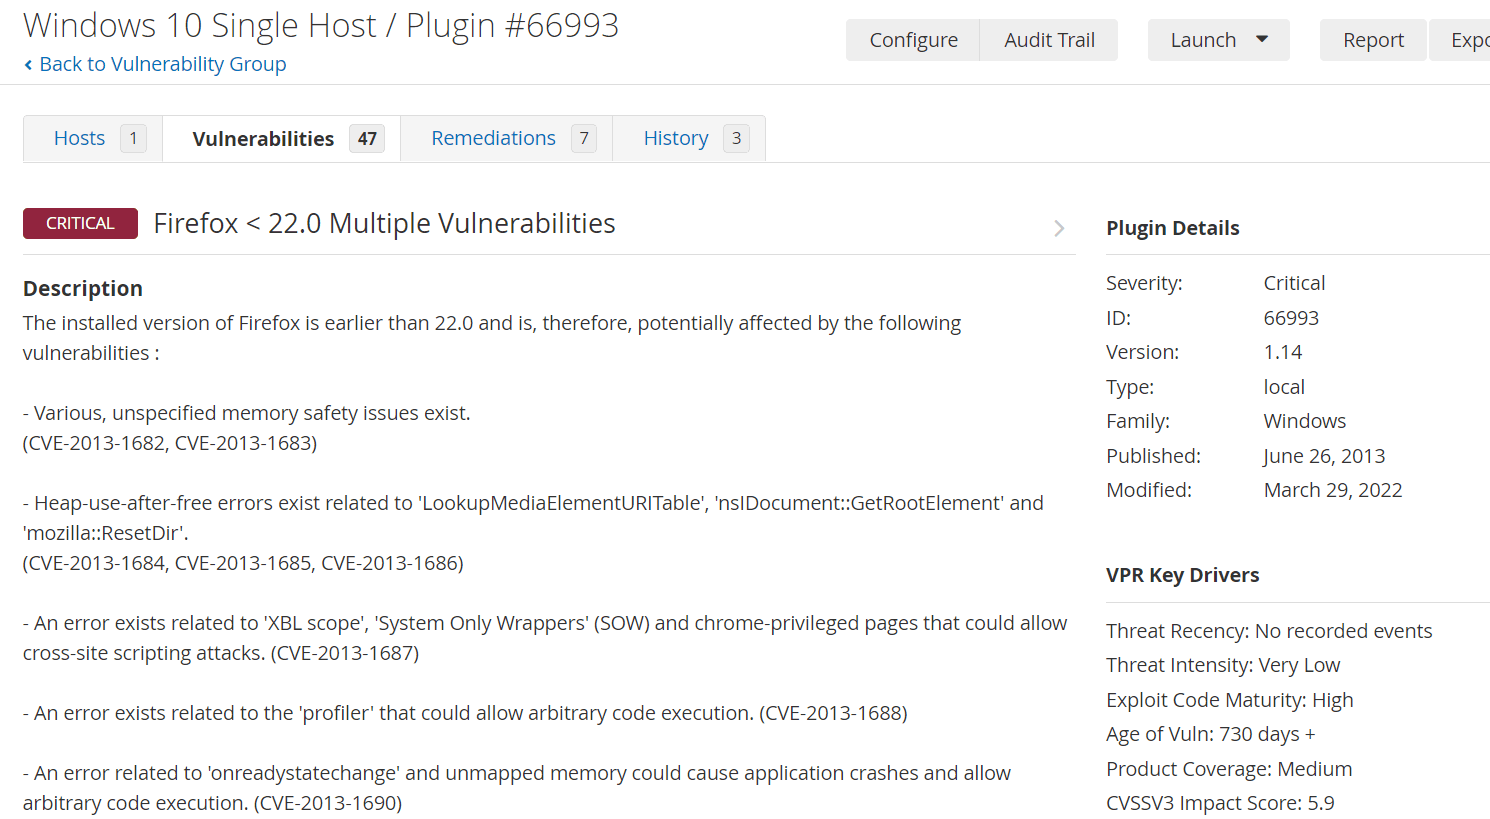
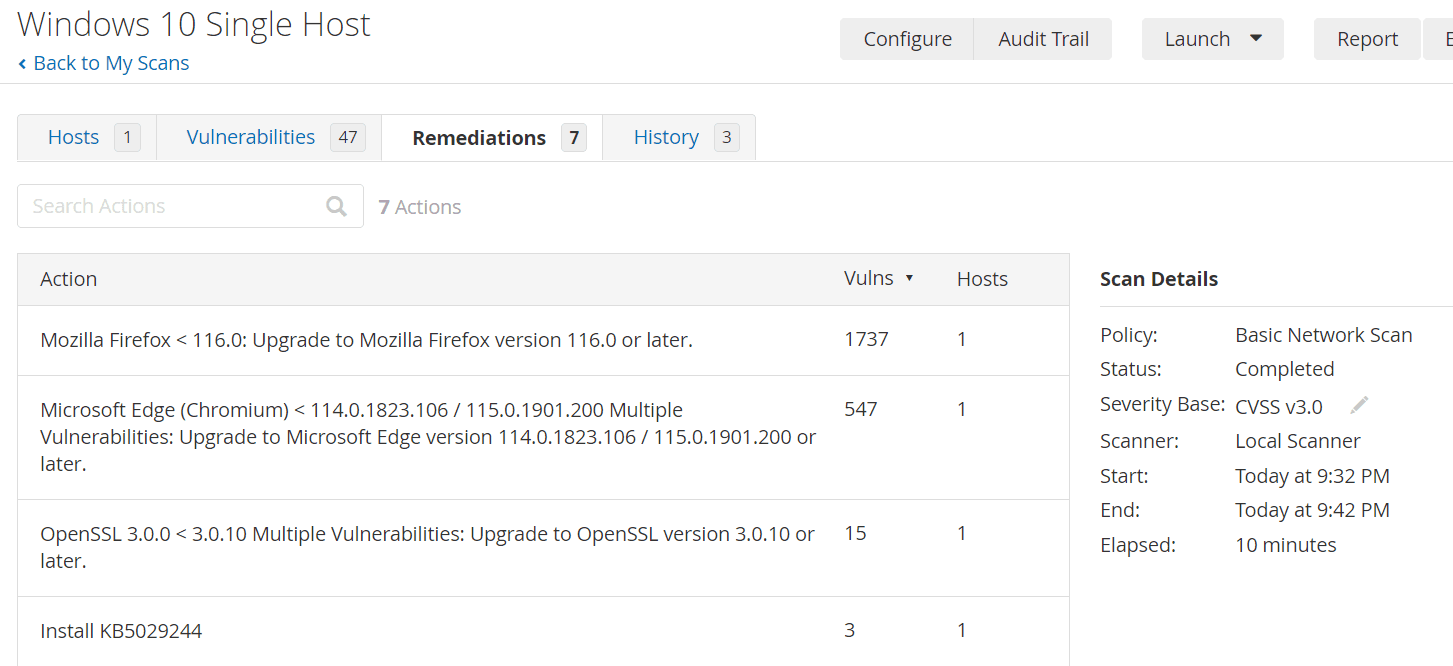
Address and fix detected vulnerabilities
Navigate to run on VM and type appwiz.cpl to open programs and features
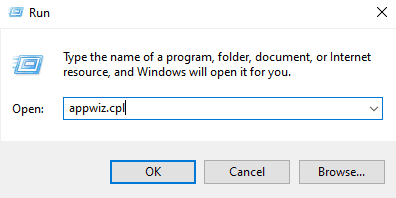
Uninstall firefox
Perform a windows update
Update Microsoft Edge
Check scan outcomes after vulnerability mitigation
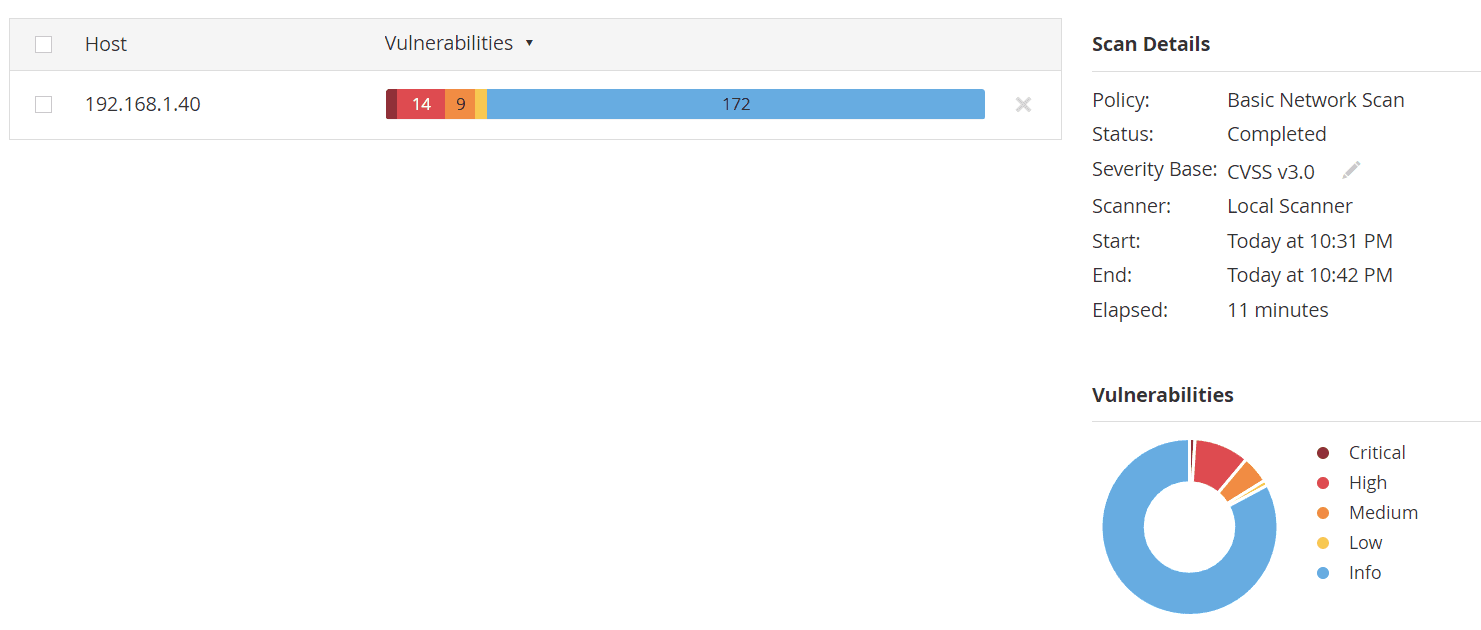
After taking steps to remove Firefox and applying multiple Windows updates, our subsequent system scans showed a notable decrease in vulnerabilities. These proactive measures directly contributed to strengthening our system's security
Additional reflections on managing vulnerabilities in a business setting
In a corporate setting, one of the primary responsibilities involves conducting systematic scans across various departments to identify potential vulnerabilities in the system. These scans require close collaboration with different departments to obtain the necessary credentials and access permissions. Once vulnerabilities are identified, the next step is to work alongside the relevant teams to devise and implement appropriate remediation measures, ensuring the security and integrity of the organization's digital assets and infrastructure.
Closing Thoughts
After using Nessus in our project, it's clear how crucial regular security checks are. Nessus pointed out weak spots we need to work on. As we finish this project, the tool has reminded us of the importance of always staying alert in cybersecurity and working together across departments to ensure our systems are safe.